Article sections
To make Windows to power on by itself
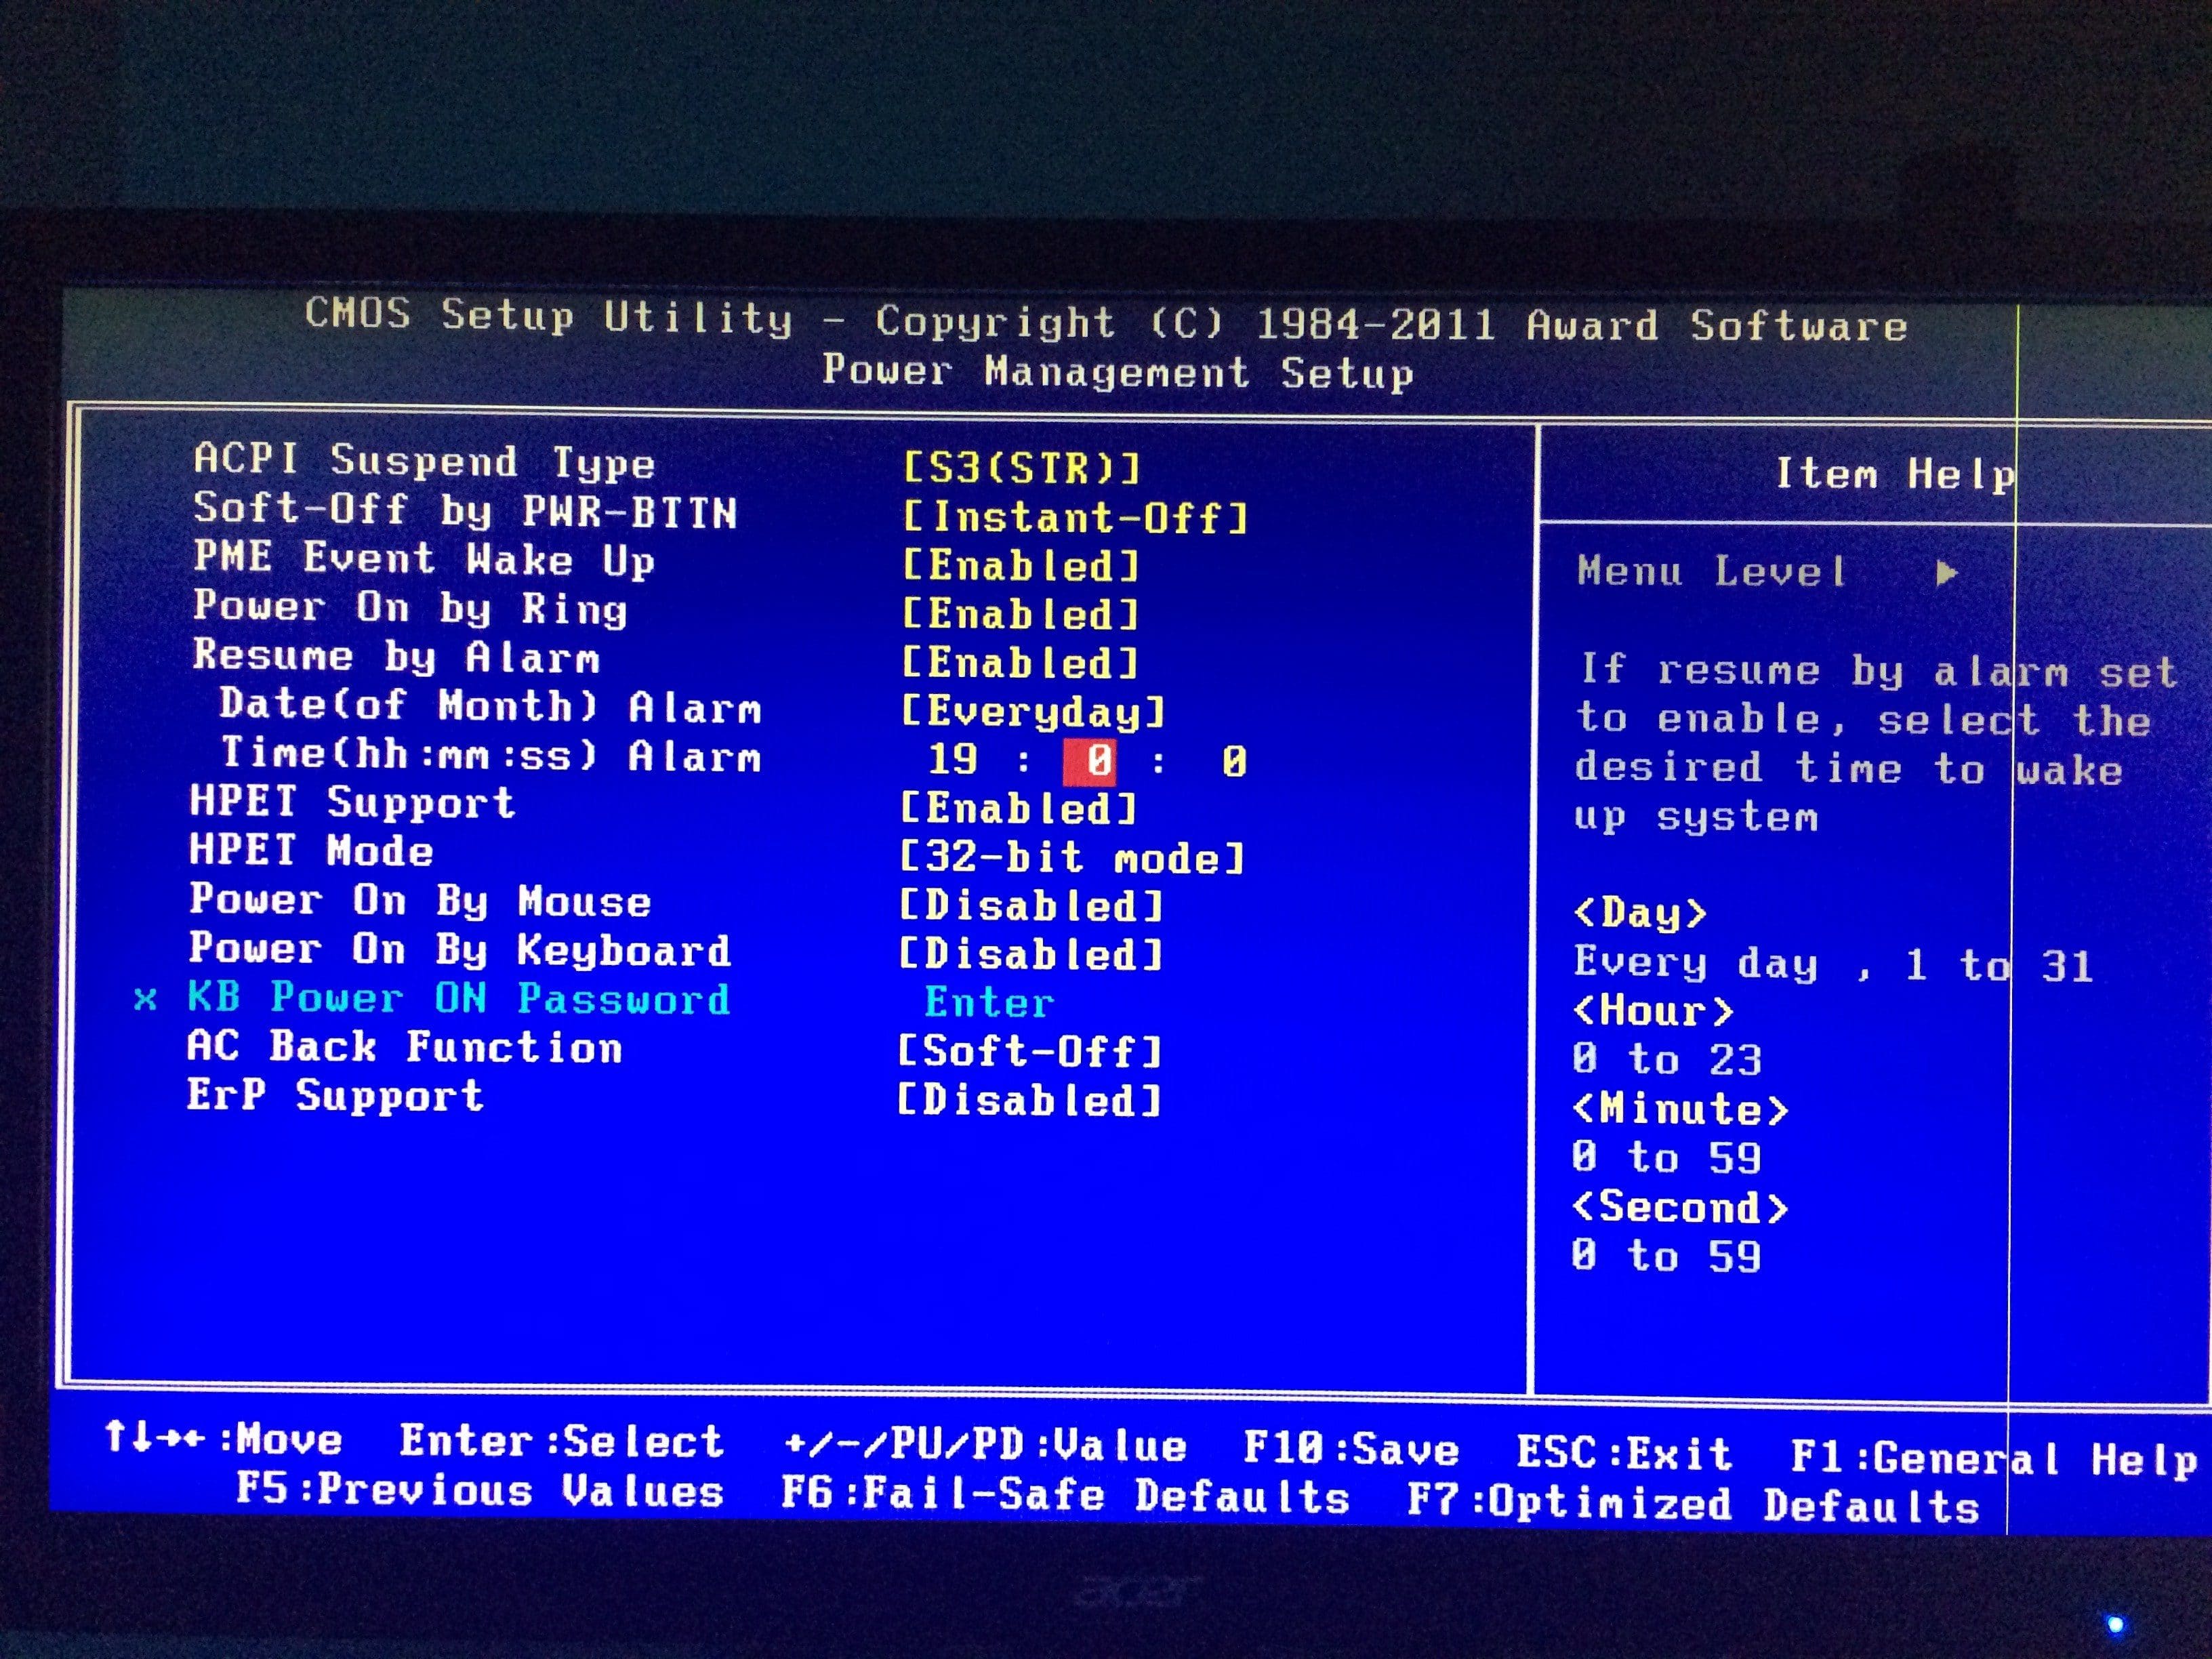
isn’t something you can achieve inside Windows OS. But you can do this by selecting the right option in your BIOS or CMOS settings. Each machine might have slightly different naming for such configuration. For me, you would first need to go to BIOS > Power Management > Resume By Alarm > Enable. From there you can configure which date of a month to anatomically power on or leave it repeated to do this every day at which specific hour of the day. Save the setting when done.
Next Configure Windows to Automatically shutdown
Now that we have configured Windows to start itself, it’s time to configure how to let it shutdown at a time of your choice. To do this, we are going to leverage the build-in tool called “Schedule Task”. You can find the setting by going to Control Panel > Schedule Task
On the right side, Action section goes find Create Task
Under the Create Task wizard make sure “Run whether a user is logged on or not” is selected. Also, make sure “Run with highest privileges” is checked. Give it a name such as “Shut down every night”.
Now go to Actions tab, click New …
This will bring up another pop-up. Select “Start a program” as the action drop down, and under Program/script: enter shutdown
Add arguments (optional): enter -s
Click OK to go back to the wizard. Under Triggers tab click “New …”
Once you have configured this task, it might ask your password of the user to run this task. Enter the logged in user’s password below.
Now when you go back to the scheduled task wizard, you will find that the task we’ve just created “Shut down every night” is showing under Action Tasks.